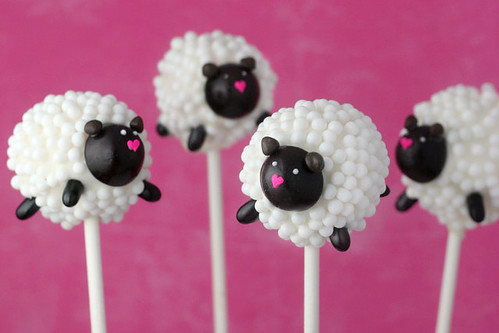
 I’m a constant reader of Bakerella and always admire her beautiful work with a tinge of envy that I can’t be that articulate with my baking/crafting. I mean, how can you top her recent Spring Lamb Cake Pops (image left)?
But alas, you can’t be creative and learn new ways to save money and find meaning in DIY if you don’t just give it a shot. So starting small, I want to try to make my own chocolate easter bunnies. There are so many ways to do this and make it your own experience. Plus if you have children or friends, it’s a great activity to share and give as a inexpensive gift!
Step 1 – Decide What Kind of Bunnies You Want
There is a wide array of candy templates available at local hobby and craft stores (you can even check Ebay!) thanks to the growing popularity of baking and candy making at home. They are not only inexpensive but there are plenty of choices to suit your taste in bunny shape. You can find some here.
Step 2 -The next step is deciding what type of chocolate you’d like to make your Easter Bunny with. There are endless choices and opportunities to make your own mix or select a flavor. It is no longer even necessary to mix your own chocolate from scratch (though you can if you like). The same store you buy your template from will have a hearty supply of candy melts. Candy melt is comprised of bags of small round chips of chocolate that come in many varieties. Common choices include milk chocolate, dark chocolate, and white chocolate. NOM!
Step 3 -The tools you’ll need for making your Easter Bunny are quite simple. If you have a microwave, a large glass/plastic measuring cup (4-cup size or greater) and a spoon you are set to go! Simply pour your chosen candy melts into the measuring cup and microwave on high for 30 seconds. This will soften the melts Since microwave ovens vary, monitor it closely. After the initial 30 seconds, stir and continue to microwave and stir until the melt’s shape has completely dissolved in a pourable consistency.
If you decide to use your stovetop instead, use a double broiler method by boiling a few cups of water in one pot. Once the water has boiled place a smaller pot, containing the melts over the pot or just inside it without letting the water get to the chocolate. Stir until the melts dissolve into a pourable consistency.
Step 4– Once stirrable, quickly but carefully fill molds. Lightly shake the form as you pour so that the chocolate will settle smoothly into the entire form without bubbles. Once filled, carefully place it on a level shelf in your freezer. Remember to never store your chocolate in the freezer, this step is merely a method to “set” the chocolate.
Step 5– Check your bunny after one-half hour. Lightly test the middle. If it is solid, your bunny is set and should be removed from the freezer.
Step 6 – Carefully over towels remove your bunny from the form. Wrap in plastic or cellophane.
Once this process feels comfortable, there are lots of ways to customize your bunnies. Here are a few fun options:
- Add crisp cereal to your melted chocolate for a crunchy bunny
- Create a gooey peanut butter or fruity flavored center. You can do this by coating your form, but not filling it and allowing it to set. you can then fill with a layer of peanut butter and fill the rest with chocolate and allow to reset in the freezer. You can add fudge to create a truffle bunny.
- Make chocolate bunny pops by adding a pop stick on the bottom of your bunny
- Create your own custom flavor of chocolate or melt your own favorite flavor bar
You can also make tons of other shapes and decorative designs using candy springkles and frosting! Don’t even feel limited to making bunnies, there are tons of other Easter holiday icons to endeavor upon.
Enjoy!
{image via Country Living Magazine}
You may also like


This is great! Thanks so much for sharing!
~Liz