If you have a Chrysler/Jeep anywhere from 2002-2008 I guarantee that at some point you are going to one day try to roll up the window, hear a pop, and the window no longer goes up or down with the switch. Almost every time this is a window motor regulator that has failed. Where it has failed can vary, but most commonly some of the plastics in the lifting mechanism has broke or come apart.
Unfortunately Chrysler/Jeep does not sell window regular parts and you must replace the whole window regulator. Taking apart your door and replacing the window motor regular may seem like a daunting task, but it is very easy and will save you hundreds of dollars.
Jeep will want over $400 to do this service in most cases, and a new window regulator can be had for under $125 in most cases. That is a significant savings.
So today I will go over exactly what you need to do this job and how to replace your rear window motor regulator in my 2006 Jeep Liberty. The front is not very different so this guide can also help you if you are in the position that you need to replace the front regulator.
Tools you will need:
10mm socket and socket wrench
Small flat head screw driver
Medium Phillips screw driver
Plastic pry to assist removing door panel (optional but helps)
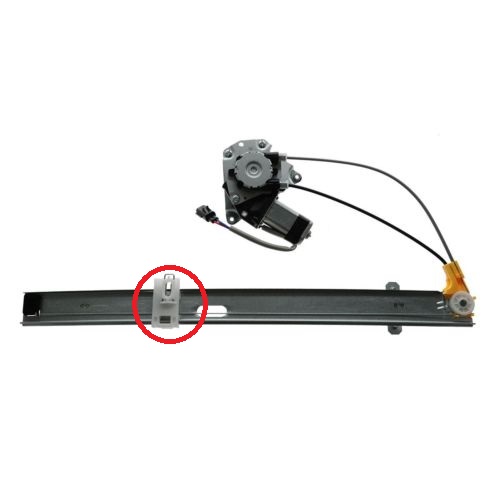
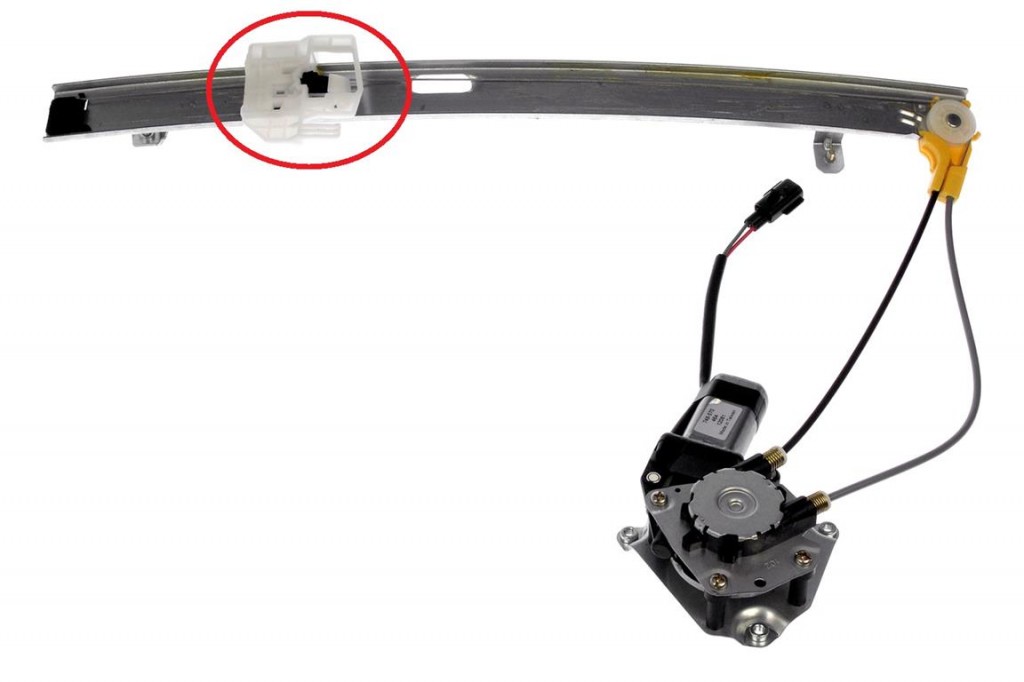
Jeep Window Regulator – Make sure you get the proper type of regulator for your year Jeep. I would have your VIN ready to verify which type you have. There are two types, and the difference is the window lift plate that the window glass connects to.
The Process:
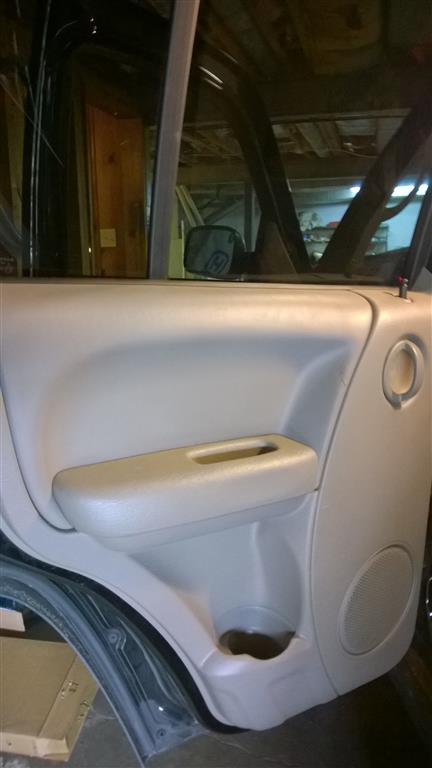
Disconnect the battery from the car to prevent any possible damage to electronics. Next, locate two screws that hold the door panel to the door. There is one in the handle, and one in the door latch.
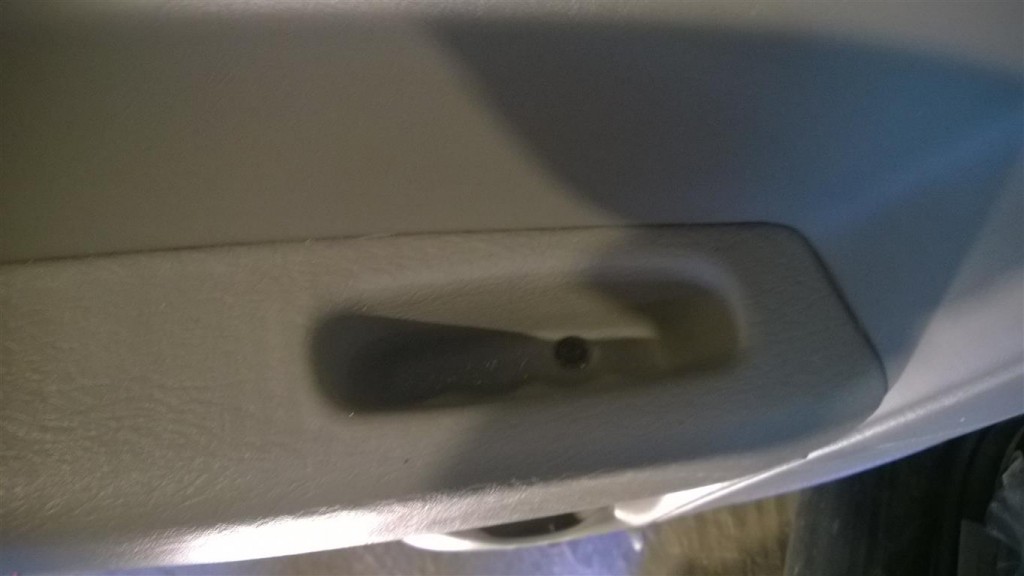
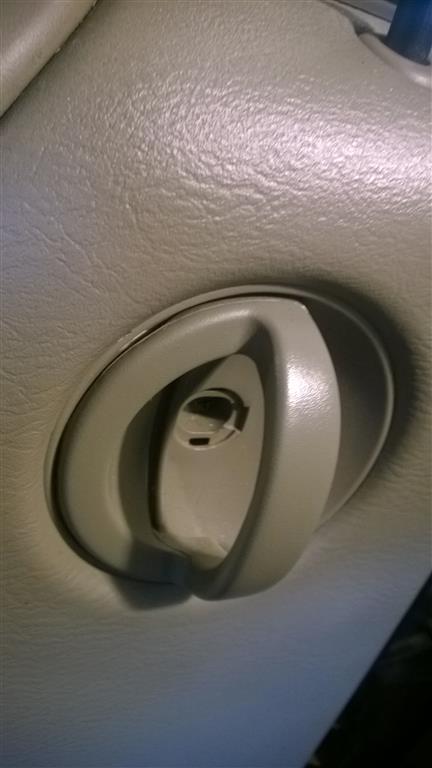
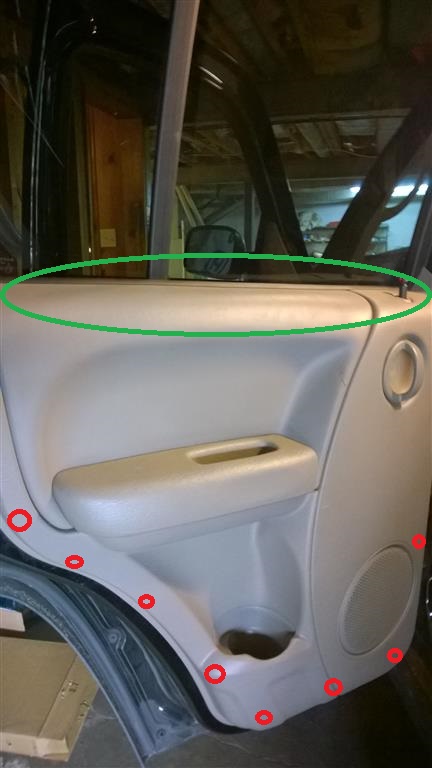
The next step you kind of have to carefully pry the door panel in the bottom areas and they will pop loose, and then you will need to lift up to get the door panel off of the top of the window sill. A plastic pry tool like these will help a lot to minimize any damage.
The areas in RED you will want to pry off outward. Once you have those loose pull the door panel up to release the area in GREEN
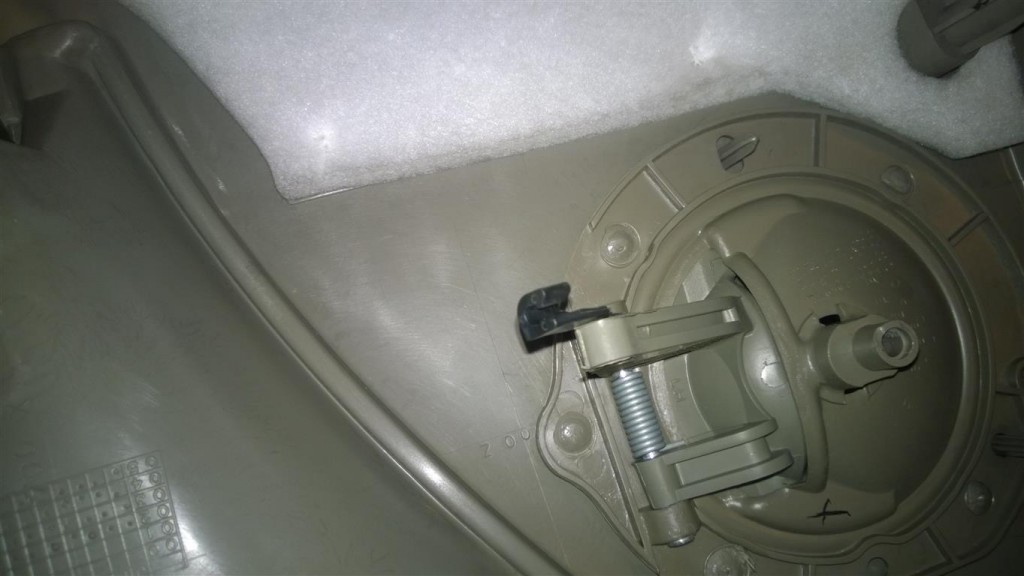
Once the door panel is off you will need to release the door latch cable. You pry it CAREFULLY (it is made of plastic) off of the latch as you can see here:
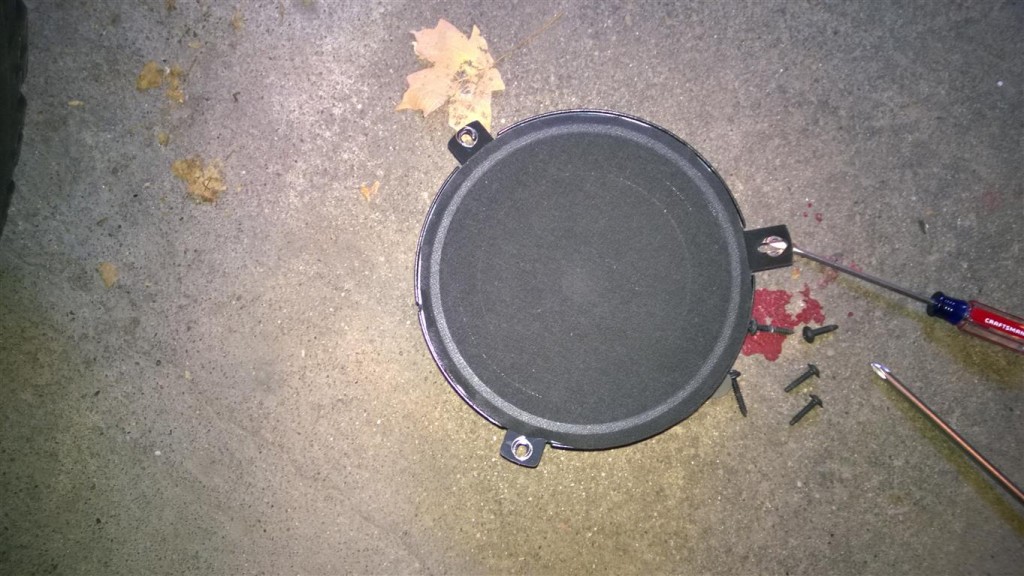
Next you will need to remove the speaker. Three easy screws and a simply speaker wire clip and this comes right out.
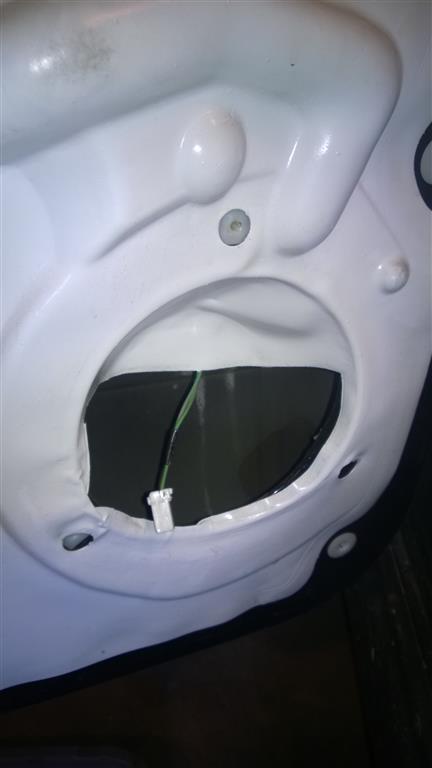
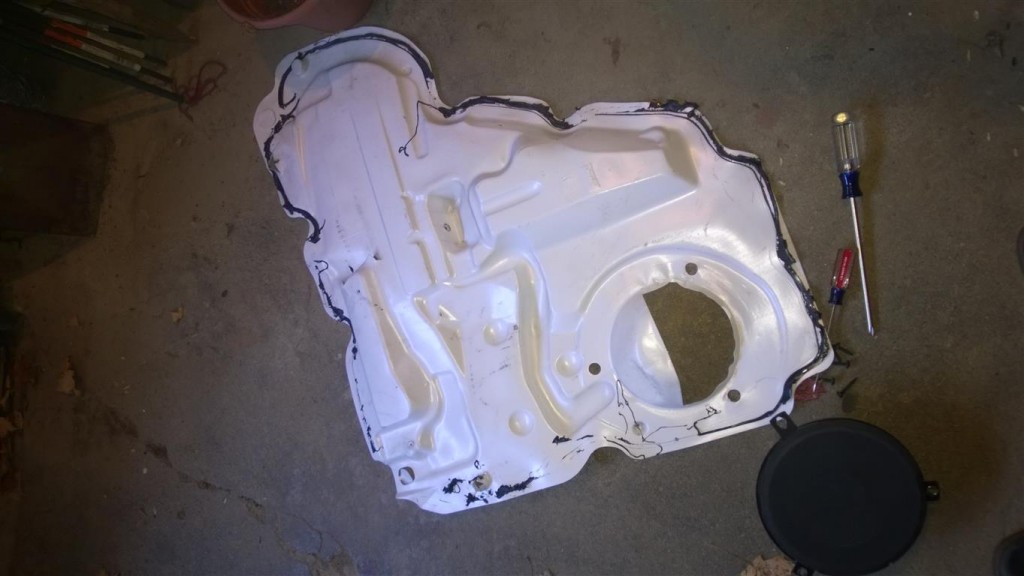
Then you have the door plastic cover which you just gently pull off the metal door. This has sticky tar-like glue holding it on which should mostly stay on the plastic. It is tacky and will easily re-attach when you press it back on.
From here you will push the window down in order to access the lift plate as seen in the Type 1 and Type 2 photos. Type 1 is very easy to remove as you just take a flat head screw driver and pull off the metal clip. Type 2 is a bit more difficult and requires you to remove the black rubber piece . In either case if you damage the lift plate your new regulator should come with one so no worries.
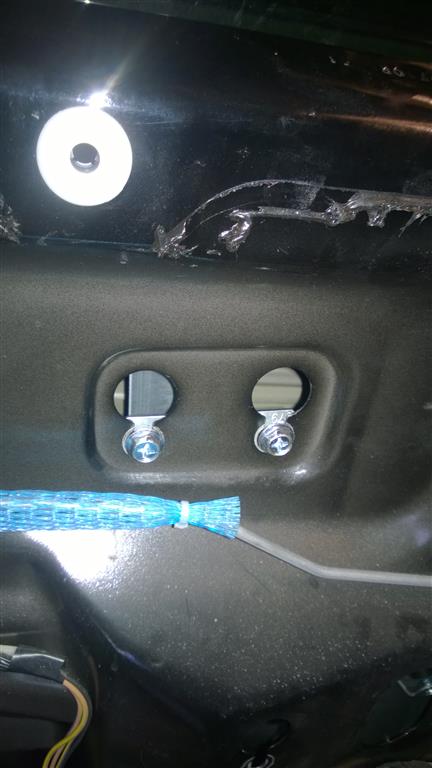
After you have removed the window from the lift you will loosen and remove the bolts in green below. You will need to unplug the regulator from its power wire clip. This can be a little tricky. The orange piece pictured below slides out to allow the harness to be removed with a flat head.
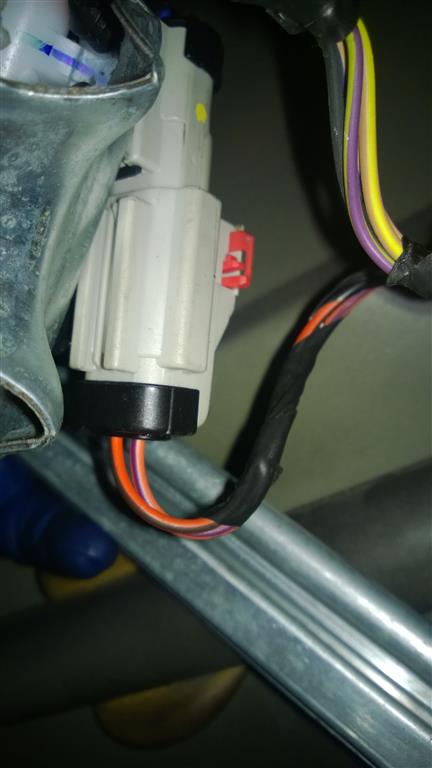
After removing the power harness move the window to the full up position and fish out the regulator unit. It takes a little finesse but should come out eventually.
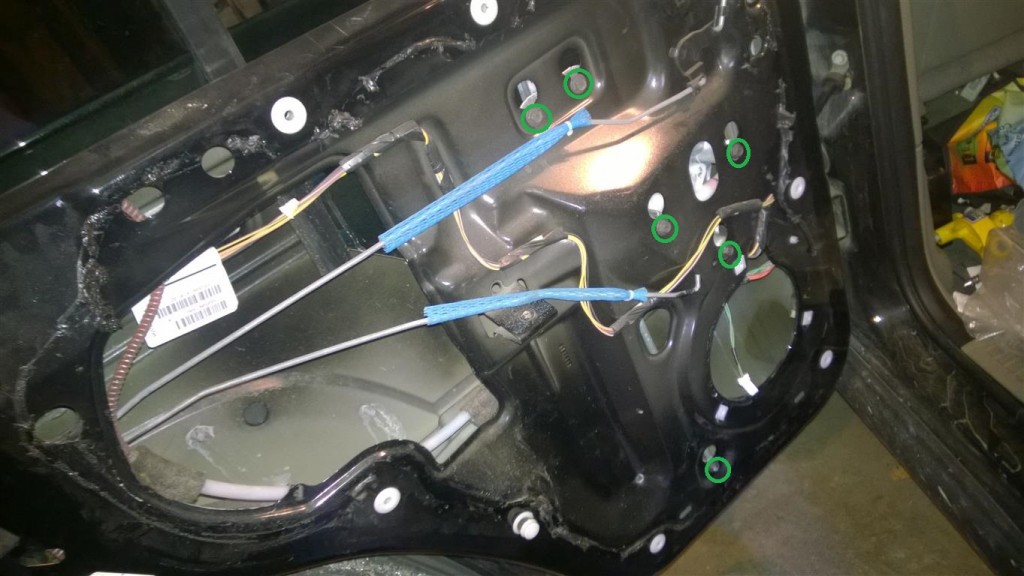
Install the new regulator in the opposite fashion. My regulator replacement came with new bolts so I installed those.
To attach the window back on to the lift plate for Type 1 you simply press the window peg against the metal clip (do not remove the new metal clip) and it should pop right into place. For Type2 you slide the window down into the plastic piece and there should be a round clip that pops into the hole in the window.
Reconnect the power harness to the regulator and then connect the battery to the vehicle and test that the window rolls up and down.
From there you just put back together the plastic sheet, the speaker, and then the door panel. I also went ahead and cleaned the window in the areas that you cannot get to without the panel off.
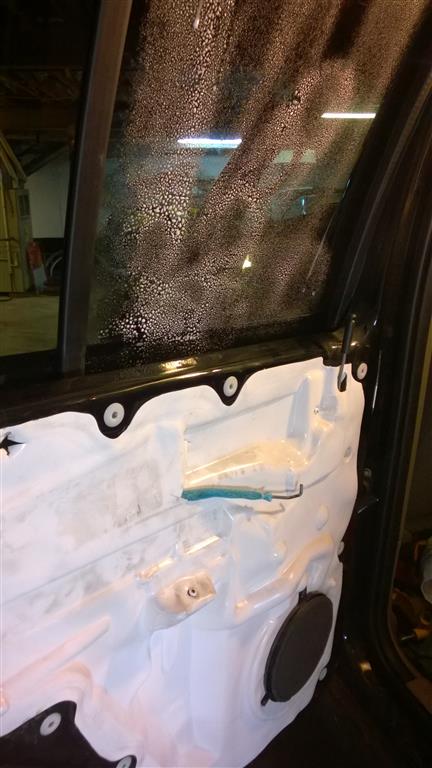
Congrats you just saved yourself a couple hundred bucks!
You may also like

