
The 350z (Z33) OEM Brembo setup is plenty of brake for the public streets, autocross and even HPDE (High Performance Driving Education). However once you start driving really fast, even my lightweight Z33 (2900lbs without driver) was beginning to expose the shortcomings of the Z33 OEM Brembo setup.
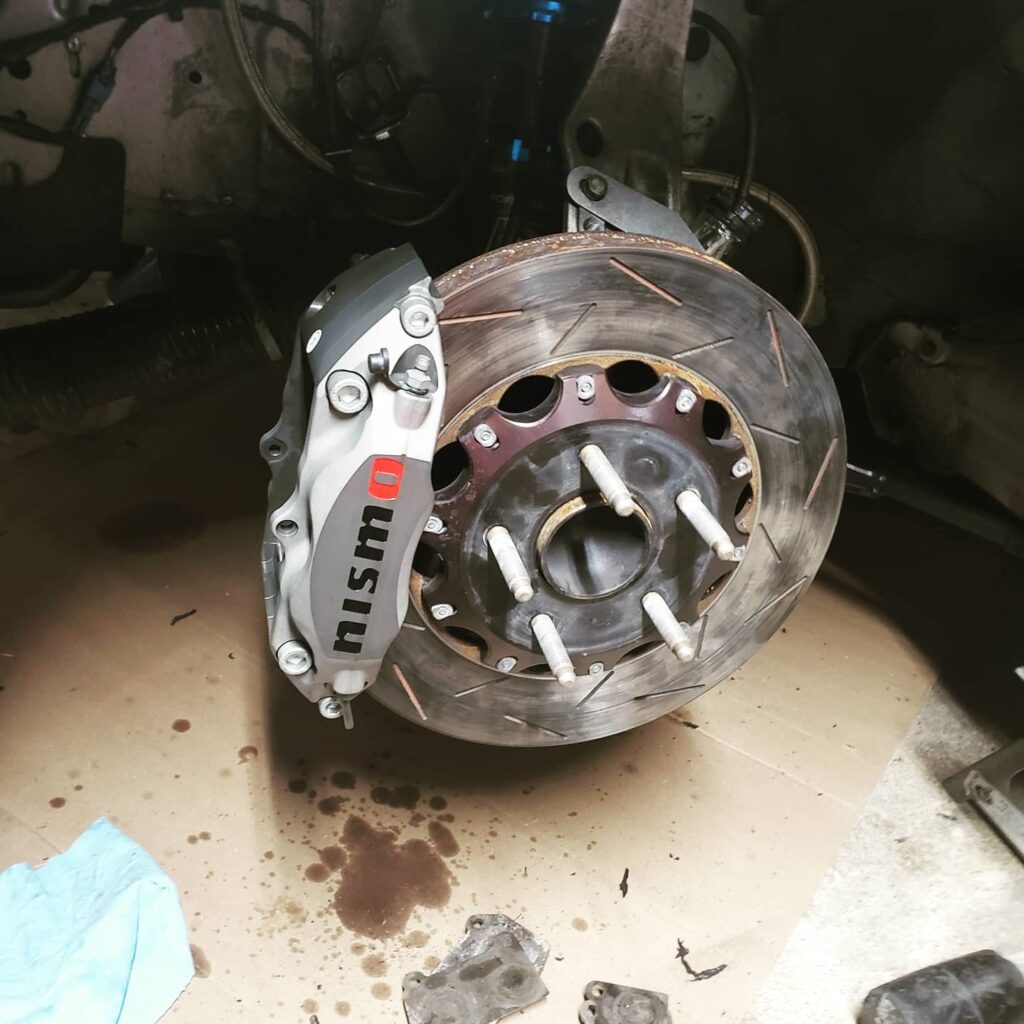
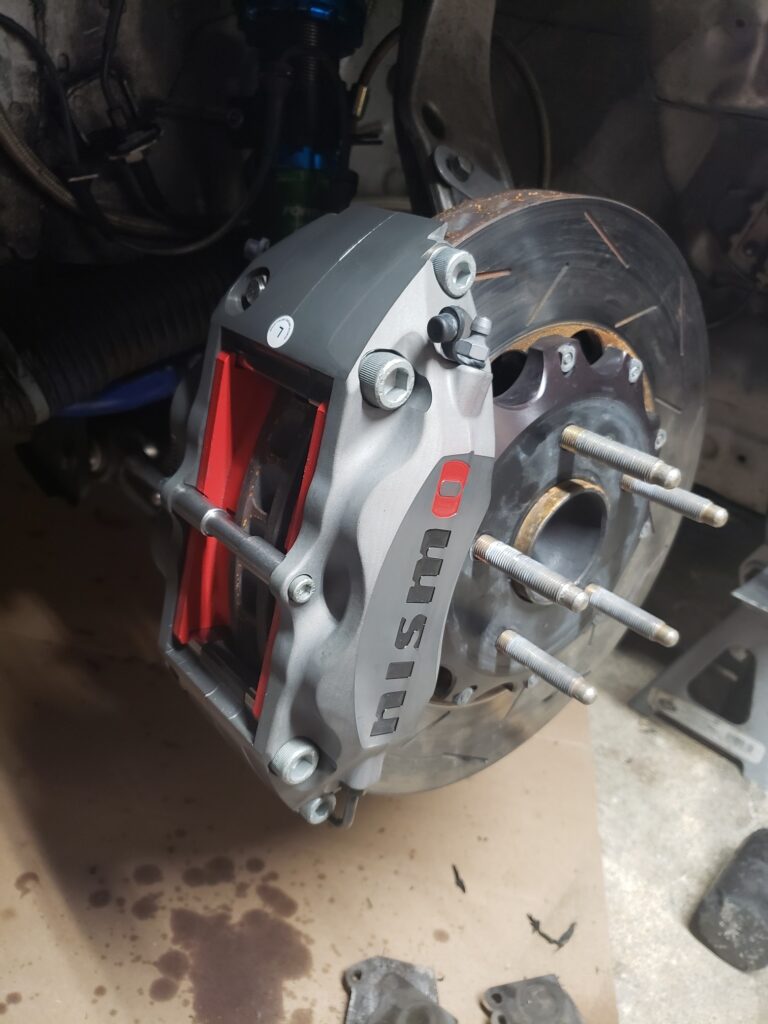
Thankfully Nismo partnered up with Stoptech and created a really nice looking front and rear caliper kit that bolts on to OEM location without any modifications. It also does not require a new rotor! This kit also allows you to swap pads with just one bolt removal! No springs and cotter pins, etc. That’s going to save time and errors track side!
But Neil, caliper installs are literally 3 bolts
Yes, I know, I know. THEY SHOULD BE SIMPLE! I wanted to do this write up because when delivered the kit does not come with any instructions and it is not as fully clear as one would think a simple caliper install would be. Long story short, this should take you less than an hour if you follow my guide. I will save you the hour of head scratching that I did on the first caliper.
I wont go into how to remove your old Brembo or OEM calipers, its pretty simple: remove the brake pads, remove the 2 22mm bolts that hold it onto the knuckle and then remove the brake line (NOTE: save yourself a mess and have a bottle ready to put the end of the brake line in as brake fluid will start to drain a bit).
On to the install!
The Nismo/Stoptech 41001-FR350 kit comes with these items:
- Calipers
- Brackets (nice, high quality CNC aluminum)
- Hardware (bolts/washers)
- Pads

A few tips to make your life easier:
1. Remove the rotor first. This makes the bracket install much easier.
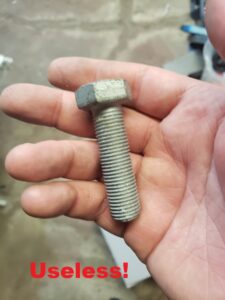
2. The supplied bolts that came with my kit did not fit the brackets threads (don’t try to force them, you will completely trash the threads). Re-use OEM bolts and chuck the ones they shipped you.
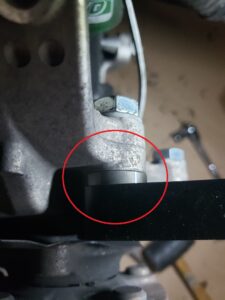
3. The “washers” that the kit comes with are actually spacers! If you put them on the bolt head side, the calipers will not fit! They must sandwich between the knuckle and the bracket. It took me FOREVER to figure this out. Reuse OEM washers on the bolt head side. Maybe this allows them to re-use the bracket for different model Nissans
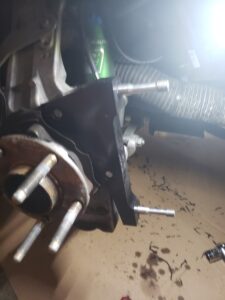
Notice that I have trimmed all of my dust shields. Good to do on a race car.
4. Reinstall rotor, slide on the caliper, torque down, install brake line, install pads.
5. Bleed brakes until no air bubbles are seen.
6. Check your brake line clearance at full wheel rotation each side. Since the mounting distance to the new caliper has changed slightly, it was necessary to re route the brake lines a bit to avoid the brake lines rubbing.
7. Enjoy the new stopping power! *And hopefully a smooth, simple install.
You may also like
 Motorsports Park Hastings with NASA Central Region
 NASA Provisional Racing License Holder
 September 2015 NASA Central at Kansas Speedway
 4-11-2015 Gateway Motorsports Park with NASA Central Region
 6-21-2014 Hallett Motor Racing Circuit – NASA HPDE3/4
 How To: Change the differential fluid on a Nissan 350Z